good afternoon y'all!!!! we're sitting here waiting on the next round of winter weather to roll in and I don't mind telling you that I'm praying it doesn't!!!! but we are supposed to get some ice and sleet, so we'll see what happens. God is in control of it all. so I'll try not to waste my time worrying about it. thanks You God for you watchful hand of protection!!!!!
so, this morning I got up and got started on a new batch of brioche bread. the first thing I needed to do was refill my yeast jar. I keep my yeast in the freezer, so when I got my jar filled, I vac sealed my yeast again and popped it back in the freezer and put my yeast jar back in the fridge. it will keep a VERY long time like this. so if you bake a lot, you might consider getting several pkgs of yeast and throw them in the freezer.

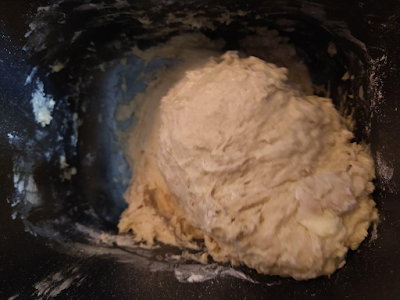
the next pic is what my bread pan looks like when I get everything in. I start with the wet ingredients first and then the dry ingredients and finish with my butter cut into small pieces and evenly spaced over the top of the dry ingredients. then I sprinkle all my yeast evenly over the top of everything.
this recipe calls for water and milk. I don't keep milk on hand, because it will go bad before we use it. I do keep powdered milk on hand. so, I got the one cup of water measured and then added 3 tablespoons of water to the one cup. next I added 2 teaspoons of powdered milk to the 1 and 1/3rd cup of water. I also used warm tap water. very warm tap water. I wisked the powdered milk into the water and when it was all dissolved I poured it in the bread machine.

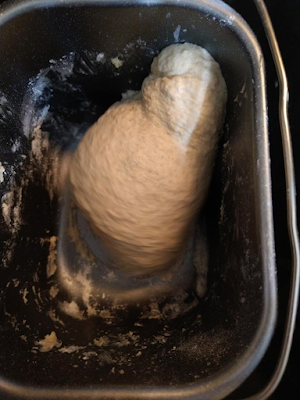
once I got all ready, I turned the bread machine on. when I do so, I watch it like a hawk. I like to see how the bread is coming together and keep an eye on the dough ball itself. it may be too dry and need more water or it could be too wet and need more flour. this is a VERY sticky dough, so you have to know that going in, so you won't add too much flour to it. you can see that is really sticking to the sides of the bread pan.


up to this point, I've added an extra 2 tablespoons of flour. it's important to go slow adding the flour. if I get too much it will change the texture of the dough and we don't want to do that.
it's also important to note that this is a roll/bun recipe. it makes more than a regular loaf of bread made/baked in the bread machine. if you leave this batch of dough in the machine to bake, it will rise to the point of spilling out into bread baking chamber and that would be a horrible mess and would probably ruin the machine. so that's important to take note of with the breads you're making. is it a loaf of bread, or is it 20 buns? if it's buns, don't assume you can bake the amount of dough for the buns in the bread machine. more than likely it will explode in your baking chamber and we don't want that mess to deal with.
 |
when my bread machine stopped for the first time, it was after 30 minutes of kneading time. that's when I took the dough out and started weighing it and dividing it out for the buns and loaves.

so this is my dough ball and you see what it weighed in grams. I sectioned out a dozen balls of dough weighing 45 grams each.


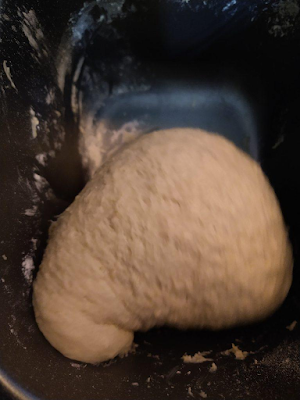
I apologize for some of these being out of sequence, I tried so hard but, I failed miserably. anyway, this is what the dough still looked like in the pan. you can see that the dough actually stopped sticking to the sides and bottom of the pan and that is what I was looking for. plus, it's still really sticky.


this is my 2 red silicone trays and 2 loaf pans ready to rise before baking.

you can see the loaves are doing pretty good.

here they are just before taking their spin in the preheated 350* oven.

this is how my buns looked just before their turn in the hot oven.

ok now, mini loaves are done!!! don't they look nice!!!!!! they really rose a bunch more in the oven. yay!!!

get a look at these beauties!!!! oh my gosh!!!! these have best "hand feel" of any bread I've ever baked before!!!! they are my NEW "go to" bread!! I love experimenting with bread and looking for that next great loaf or best buns ever. I'm here to tell you the search is over.
they smell divine. they are soft to the touch. springy.

this is the first batch outta the muffin top pan and don't they look so good. I turned a couple of the bottoms up so you could see how they bottom looks too. I'm so happy to have this recipe.


and here is a bun cut open. I used a serrated knife to cut it and there was not any crumbs, maybe a couple of tiny little specks that stuck to the serrated edge.

this bread is kinda chewy without being tough. it's very soft. I have never had brioche before, at least that I remember. so I don't have anything to make my commparisons to. but this is without a doubt, the best bread I've ever made. my sweet husband will love these buns for his breakfast. he really enjoyed the sandwich we had at lunch from them.
so if you read this far, you might want the recipe. if so, here it is.
Brioche Buns Recipe for 20 buns
1 cup plus 3 tablespoons of water
2 teaspoons of powdered milk dissolved in the water
1 large egg
2 1/2 tablespoons of sugar
1 teaspoon of salt
3 cups of all purpose or bread flour
1/3 cup of white whole wheat flour (I used regular whole wheat flour)
2 1/2 tablespoons of butter cut into tiny pieces
1 tablespoon plus 1/2 teaspoon of yeast
put liquid ingredients and egg in pan first. then add sugar and salt. next add the all purpose flour and then the whole wheat flour.
once all the flour is in the bread pan, I smooth it out and then scatter the butter pieces evenly over the top of the dry ingredients. once the butter is in, then I evenlly sprinkle the yeast. for my bread machine, I always end up with the yeast being my last ingredient.
I set the machine on "dough cycle" and don't forget to do this part, it's very important. then start the bread machine. my machine runs for 30 minutes. its kneading the dough and getting it all incorporated well. I watch my dough come together for at least the first 5 minutes, checking to see if it's too dry or too wet and then adjusting as necessary. when it stops for the first rest and rise perod, that's when I take my dough out.
if I leave it in there for the whole hour and 34 minutes, it will work the yeast to death and it won't rise when I take it from the bread pan and break it down into buns and loaves. so I take the dough out at the first rest/rise and unplug the machine.
the dough is very sticky at this point, so I use avocado oil on my hands to keep the dough from sticking to my hands. I'll put the dough ball on my scale and weigh it in grams. I find that grams is a more accurate weight. this dough ball, I was going to make 20 buns. or the equivalent of 5 mini loaves. so that helped me know that I could make 12 buns with the equivalent of 3 mini loaves and that would leave me 2 mini loaves to bake. that is what I call my "bread math". hahaha it's probably confusing, but I hope not.
and as you can see from the pics, the rolls turned out perfect in size.
I hope you enjoy this and will try it.
something else about the flour and me adding extra. sometimes, the weather will play a big role in the weight of your flour and the dryness of your flour. the dough I maade on tuesday for my first batch of mini brioche loaves was 935 grams in weight. the dough I made today, was made exactly the same way. I even used the 3 extra tablespoons of flour to get it to the consistency I was looking for and it only weighed 905 grams. not only the humidity has something to do with the weight of the flour, but I'm also thinking that the barometric pressure may have something to do with it also. I really don't know if it does or not. but I do know the amount of humidity does play a big role in the outcome of our bread.
that's why I always babysit my bread machine when I'm starting my dough. I want to make sure that everything gets mixed in properly very early on in the process. and I like to keep an eye on it to make sure the dough isn't too dry or too wet.
with this dough, once all the butter gets incorporated into the dough, I think that's what makes this dough so nice and soty and sticky. but you do want it to make a cohesive ball. you don't want it to spill out of the pan like an unbaked cake mix. hahaha
well, there you have it, the new bread that has taken over my life. I just put 2 mini loaves in the freezer and now I have 2 more to put in there too. that's great though. because I can concentrate on only buns now.
I apologize for any spelling mistakes and will try to correct them as they jump out at me.
**************************************
I guess this is about all I have today. I hope you keep God first place in all you do, even in your bread baking. hugs and love, patty
No comments:
Post a Comment